![]()
A Student's Guide to Mapmaking
- by Ralph Ehrenberg
What Is a Map?
| Maps are one of the most important types of documents associated with exploration. A map is a graphic representation that facilitates a spatial understanding of things, concepts, conditions, processes or events in the human world. They are used by explorers to help find their way. They are also prepared by explorers to document or record what in fact they discovered. There are many types of maps, each determined by the purpose for which it is designed. The road maps that your parents use are way-finding or route maps that guide them from one place to another. The daily weather charts that you see on television are special-purpose maps of natural phenomena that help people plan whether or not they will travel to a particular place! The geographical maps in your textbooks show the distribution of various things or processes over large areas. What types of maps do you think explorers used and prepared? |
 |
| |
|||
 |
 |
 |
 |
| The first step an explorer takes in preparing a map is to determine his or her location. The location of any point or place on the earth's surface can be understood only with reference to its distance and direction from another point or place. The easiest way to do this is to use familiar landmarks. |
 |
Your bus driver uses landmarks everyday as he or she drives you safely to school. You may observe these landmarks or guide points as well. They may be in the form of man-made objects representing the human or cultural landscape such as theaters, churches, and synagogues. They may be topographic or physical landforms such as rivers and hills. Or they may be prominent plants such as large trees and distinctive shrubs. Such landmarks provide a relative location or mental frame of reference, and are useful for guiding people over small areas. |
| Explorers and mapmakers, however, must determine the exact location of a place or point on the earth's surface so that whoever uses their maps can easily find any site depicted without depending upon another person for guidance. This is done by dividing the earth's surface into a grid system of imaginary lines similar to the way a football field is marked off to help officials and spectators locate the placement of the football with precision and accuracy. When applied to the earth's surface, these lines are designated parallels of latitude and meridians of longitude. Latitude establishes position north or south of the equator while longitude determines position east or west of a prime meridian, the zero point from which longitude is measured. This is called the geographic coordinate system of parallels and meridians, and provides a scientific frame of reference for locating any place on the earth's surface. More information on latitude, longitude and prime meridian can be found at the following Web pages: - Comptons Encylopedia; Longitude and Latitude |
Step 2: Determining Projection and Scale
| The transfer of this imaginary grid system of parallels and meridians of the Earth ( a sphere) to a small, flat map, however, cannot be done without distorting in some way the map's shape, area, distance or direction and changing its scale. These distortions can be easily observed by drawing a grid system of parallel lines on a large grapefruit and then laying the peeling flat. To compensate for these distortions, mapmakers construct map projections to emphasize or de-emphasize one or more of the basic map properties cited. Follow this link to view different map projections and their properties: Map scale refers to the proportional relationship between the distance of two points on a map with the actual distance on the ground. Map scale can be expressed in words ("one inch equals one mile"), graphically (with a bar divided into sections), or as a representative fraction (1:24,000 or 1/24,000). The larger the map scale, the smaller the area shown. The following Web page illustrates map scale: |
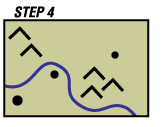
| Once the map's projection and scale are determined, the next step undertaken by an explorer is to add features of the physical, natural, and cultural landscapes that will most accurately and vividly represent the pattern and texture of the area mapped. This is done by simplifying (generalizing) the features to be shown by using symbols. Map symbols are small graphic images that stand for something else. They may be depicted by pictorial images, abstract combinations of points and lines, or tonal shading and color tints. For example, an explorer might show an Indian village by using a miniature picture of a teepee. The mapmaker often uses a key or legend to indicate what symbol matches what feature. For examples of map symbols used in orienteering, visit this Web page: |
 |
 |
The final step in the preparation of an explorer's map is selecting and applying geographical names that identify relevant features, landmarks, and places. Geographical names are fundamental elements of maps. They also provide important reference frameworks in our daily life. |
| During the early history of America, explorers and mapmakers named many of our mountains, rivers, and towns. Today, these names form part of our cultural heritage and provide clues to the history of our country's settlement and people. A list of almost two million physical and cultural geographical features in the United States is available through the following link: |
Mapmaking in the Time of Lewis and Clark
| Two hundred years ago when Lewis and Clark set out to explore the Far West, the basic principles and techniques of scientific mapmaking were well established. As early as the second century A. D. the Greek geographer Claudius Ptolemy prepared instructions for the construction of maps using latitude and longitude as a geographical frame of reference. During the great age of European seagoing exploration, Portuguese, Spanish, Italian, Dutch and English navigators developed and improved a variety of instruments to measure one's position on the Earth's surface. |
Compass Route Mapping
| By 1800 overland explorers relied primarily upon compass route mapping to prepare their maps. This is also called "dead reckoning." In compass route mapping or "dead reckoning," mapping is based upon determining direction and distance along the line of exploration. The direction or course of the route is determined by magnetic compass, an ancient instrument invented in China and used in Europe since at least the eleventh century. | 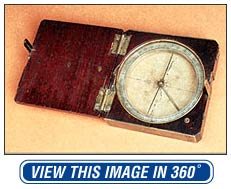 |
| By the beginning of the nineteenth century, mapmakers were aware that their compasses pointed to the magnetic north pole rather than the geographic north pole, and that they had to make corrections for this variation. Several magnetic variation maps of North America had been published by 1804 to help surveyors make these corrections but none existed for the Far West.
|
Celestial Navigation
| Nineteenth century explorers checked the accuracy of their compass bearings by celestial observation. This is called celestial navigation. In the Northern Hemisphere, latitude was determined by measuring the altitude or angle of the North Star, Polaris, from the horizon, with finely scaled brass instruments called octants or sextants. Determining the altitude of Polaris on land required another instrument called an artificial horizon since the true horizon is generally obscured. Longitude was more difficult to determine during a cross-country expedition. The most accurate method is to compare the time of a portable clock or chronometer set according to a prime meridian with local time determined by celestial observation. The results were then calculated by reference to astronomical tables of transits (ephemeris) by experts known as computers. Unfortunately, the marine chronometers of the period were too bulky and sensitive to carry overland and pocket chronometers were often too fragile to survive long distances. Local time in North America was determined by measuring lunar distances (the distances between the moon and certain stars) and calculated according to Nautical Almanac and Nautical Ephemeris, first published in England in 1765. |
Map Publishing in 1800
| Upon completion of an exploring expedition, the field maps would be redrawn on one sheet at a smaller scale and then turned over to an engraver for publishing. Today, we are surrounded by maps. We see them daily on television, in our newspapers, in our books, and on our computer screens. But in 1800, maps were rare, expensive, and available only to the leaders of society. They also looked different than the maps we use today. In 1800 maps were printed from either wood blocks or engraved copperplates and they were hand colored. These were time-consuming processes that required skilled craftsmen and artists. For an illustrated description of woodcut and copperplate engraving, see the following link: |
|
|
The detail shown on a map was also more limited in 1800 than today. Large areas of maps were often left blank for lack of information, or they were filled in with decorative lettering or fanciful pictures. If terrain features such as hills and mountains were depicted, they were generally shown in the form of "hairy caterpillars" or simple drawings of hill forms. These techniques were well adapted to both woodcut and copper engraving. Maps also reflected the lack of accurate, detailed field surveys available to mapmakers. Since no standards existed to guide mapmakers, symbols and lettering varied greatly from map to map. |
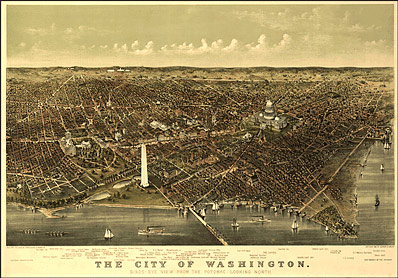
| The selection of the prime meridian also varied from place to place before the adoption of Greenwich, England in 1874. Often it was measured from the nation's capital or from the city in which the map was published. In the United States, map publishers often used Washington, D.C., as the prime meridian during the first half of the nineteenth century. Most of the maps available in the United States at this time were published in England or France. Because the United States had few trained mapmakers in 1800, many of the first American cartographers were recruited from Europe or were former military officers. |
|
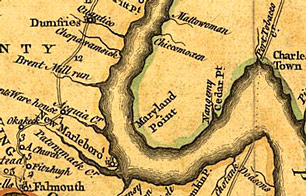
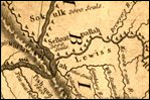
| One of America's foremost mapmakers was our first president, George Washington. He mapped large areas of the frontier as a young land surveyor. Another was our third president, Thomas Jefferson, whose father was also a land surveyor and mapmaker. The maps prepared by Washington and Jefferson provide good examples of the state of mapmaking at the close of the eighteenth century. These maps can be found on the following pages: Washington and Jefferson page1 Washington and Jefferson page2
|